Getting Started
System Requirements
| Item | Requirement |
|---|---|
| OS | Ubuntu 22+ |
| Architecture | x86_64 (amd64) or ARM64 (aarch64) |
| Network | Ethernet (same subnet as Wuji device) |
Download and Installation
Before use, complete the Wuji Glove hardware connection and network configuration. See Getting Started for details.
-
Visit the GitHub Releases page and download the Ubuntu installation package (
.deb) for your architecture: amd64 (x86_64) for standard PCs, arm64 (aarch64) for ARM devices such as Jetson and RK3588/3576. -
Run the installer:
# amd64 (x86_64)
sudo apt install ./wuji-studio_<version>_amd64.deb

# arm64 (aarch64)
sudo apt install ./wuji-studio_<version>_arm64.deb
After installation, click the desktop icon or run
wuji-studioin the terminal to launch the application. The following interface shows a successful setup: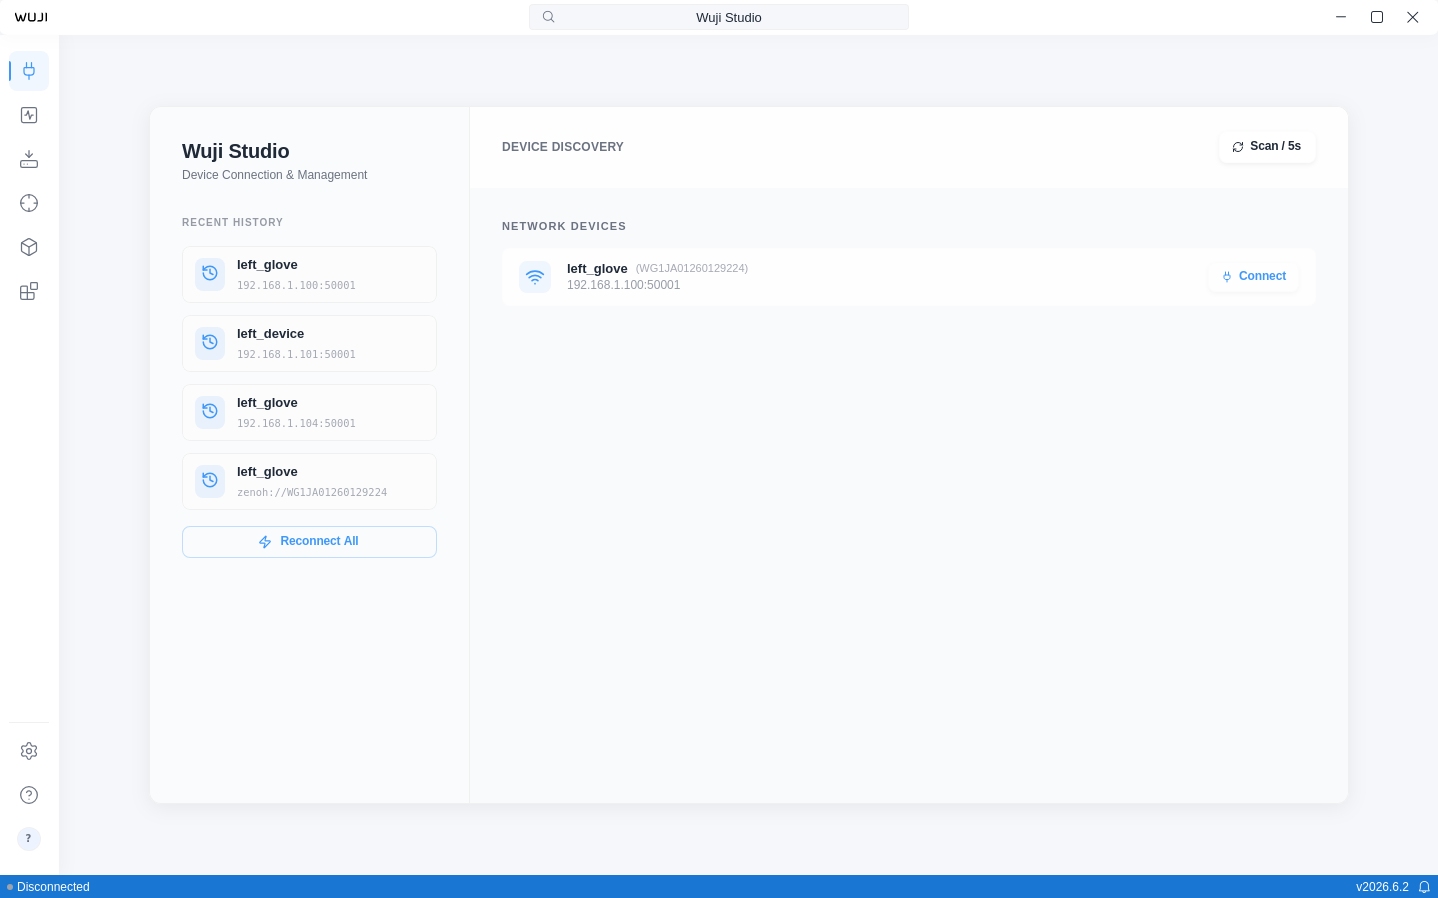
-
Click the Connect button on a device card. The app automatically detects left- or right-hand information from the device SN and generates a default name (e.g.
left_glove,right_glove).
Interface Overview
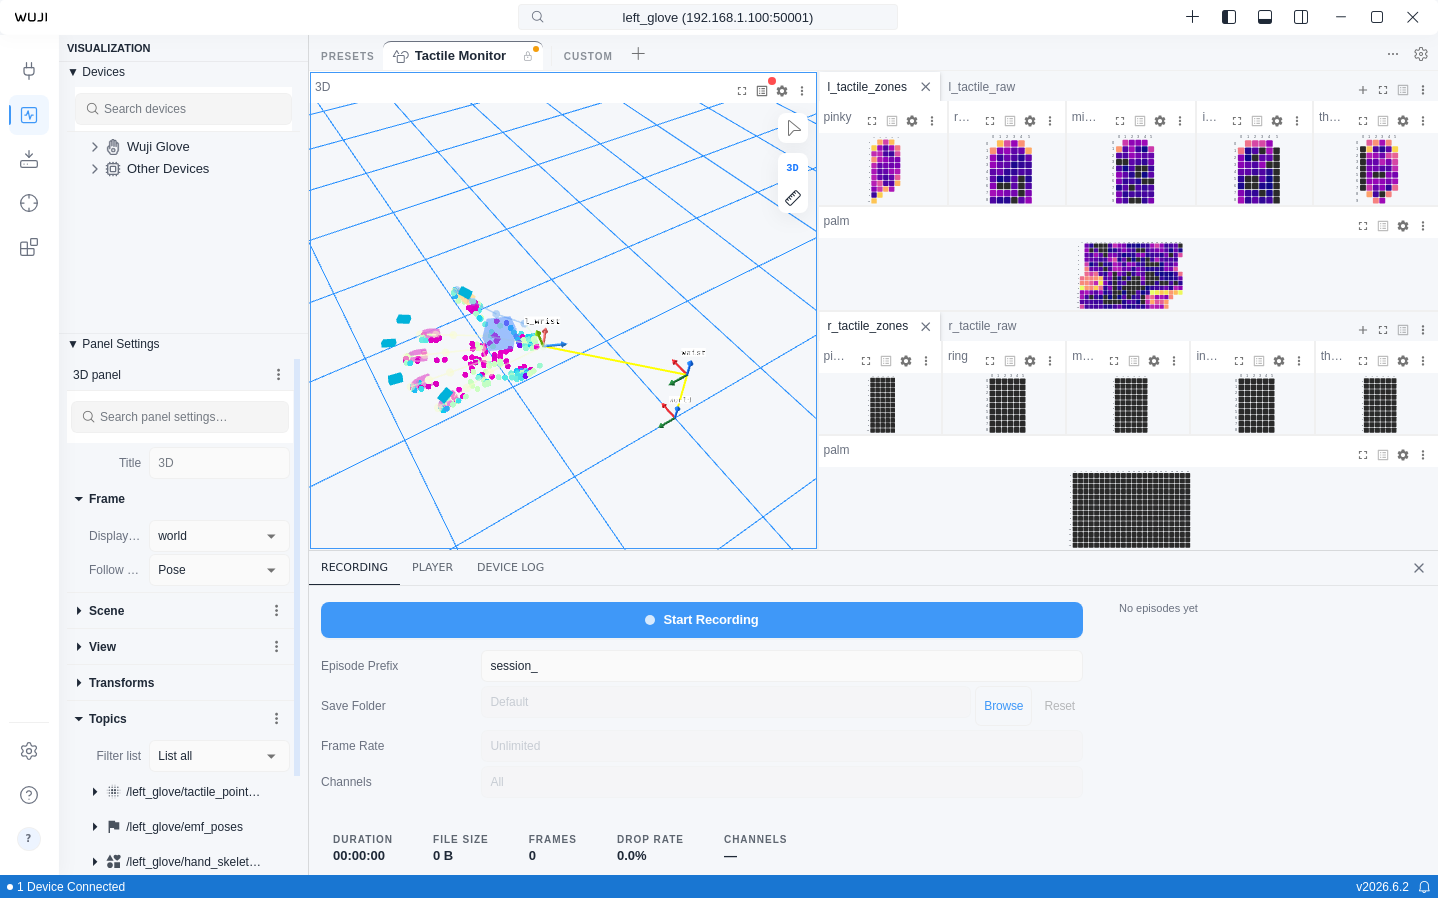
The Wuji Studio interface consists of the following areas:
| Area | Location | Function |
|---|---|---|
| App bar | Top | Search bar, device name, window controls |
| Activity bar | Left narrow bar | Switch between Connect View, Visualization View, and Firmware Upgrade View |
| Sidebar | Left panel | Device list, Topic tree, Panel settings, Layout management |
| Panel area | Center | Data visualization workspace with free drag-and-drop and split-screen support |
| Bottom bar | Bottom | Connection status, timestamp, version number, device logs |
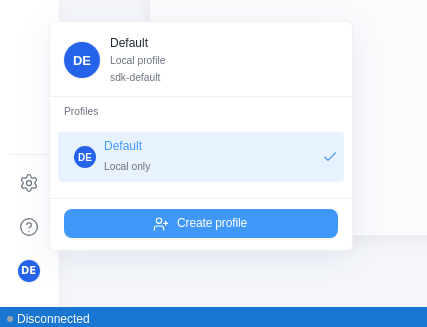
User Profile
The user avatar at the very bottom of the Activity bar opens the Studio user profile menu. Per-user data such as device calibration URDFs and tactile contact models is isolated by profile, so switching users doesn't affect other profiles.
Studio ships with a built-in Default profile that's there on first launch and can't be renamed or deleted. The Default profile doesn't save device calibration or tactile model data—create and switch to your own profile before you save that data.
Click the avatar → Create profile at the bottom of the menu → enter a name, and you'll be switched to the new user automatically.
Personalization
Click the Settings icon at the bottom of the Activity bar to open the Settings View.
| Category | Setting | Description |
|---|---|---|
| Appearance | Dark / Light / Follow System | Switch between dark, light, or system-matched theme |
| Language and region | Language | Interface display language |
| Timezone | Timezone setting | |
| Display format | Timestamp format | Display format for timestamps |
| Message rate | Display unit for message frequency | |
| Playback | Step size | Playback step duration (milliseconds) |