

This page splits into three sections by what’s on hand: simulation check needs no device, real-device run covers the full path from unboxing to a firmware upgrade, and cross-product teleoperation brings in Wuji Hand 2. Each section stands on its own, so skip to the next one when the prerequisites don’t apply.
Before You Start
You need Ubuntu 22.04 or later and Python 3.10 or later.
Simulation Check
This section needs Git, Python, and any URDF viewer. No device required. Wuji Glove ships a 21-DOF hand skeleton model for checking frames, joints, and data mapping:Real-Device Run
This section needs one Wuji Glove, the data acquisition board, the supplied cables, and an Ubuntu host.Step 1: Unboxing Check
Check everything in the box against the package contents: the USB-C to USB-C cable, the USB-C to Ethernet power adapter, the USB-A to USB-C cable, and the Ethernet cable.Step 2: Install the Software
Step 3: Connect the Data Acquisition Board
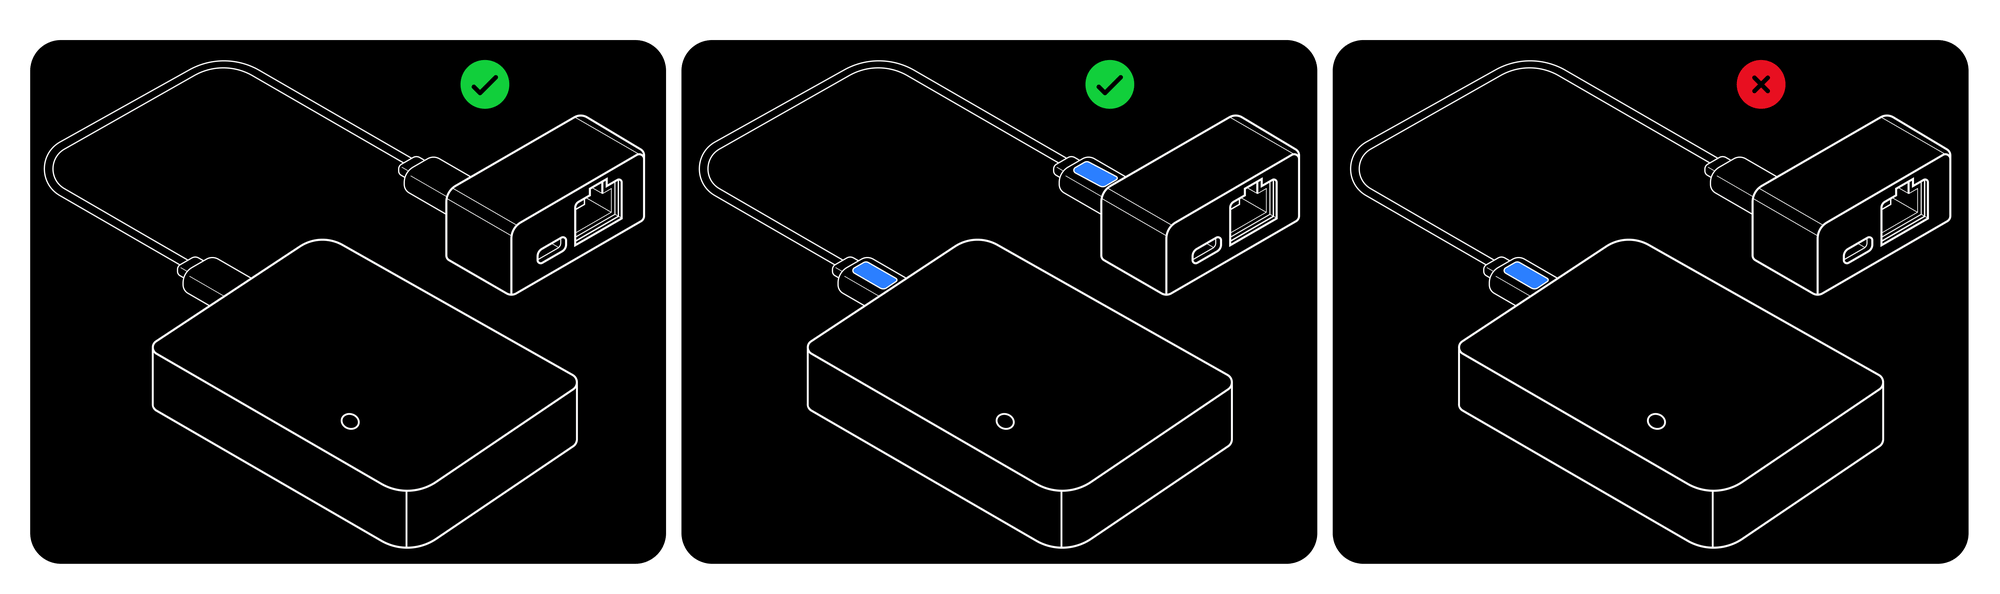
Use the USB-C to USB-C cable to connect the data acquisition board to the USB-C to Ethernet power adapter.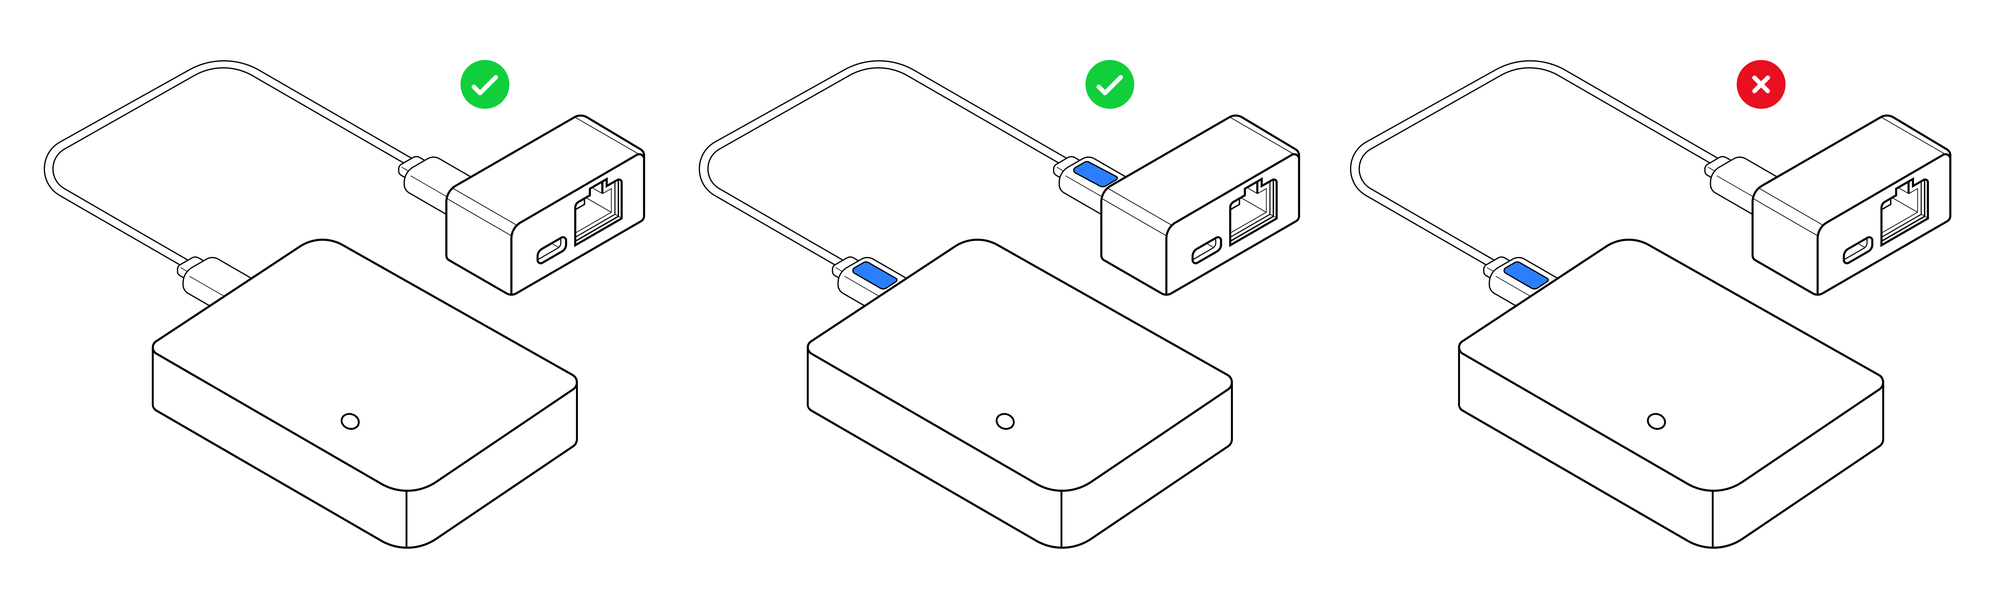
Step 4: Connect Ethernet and Power
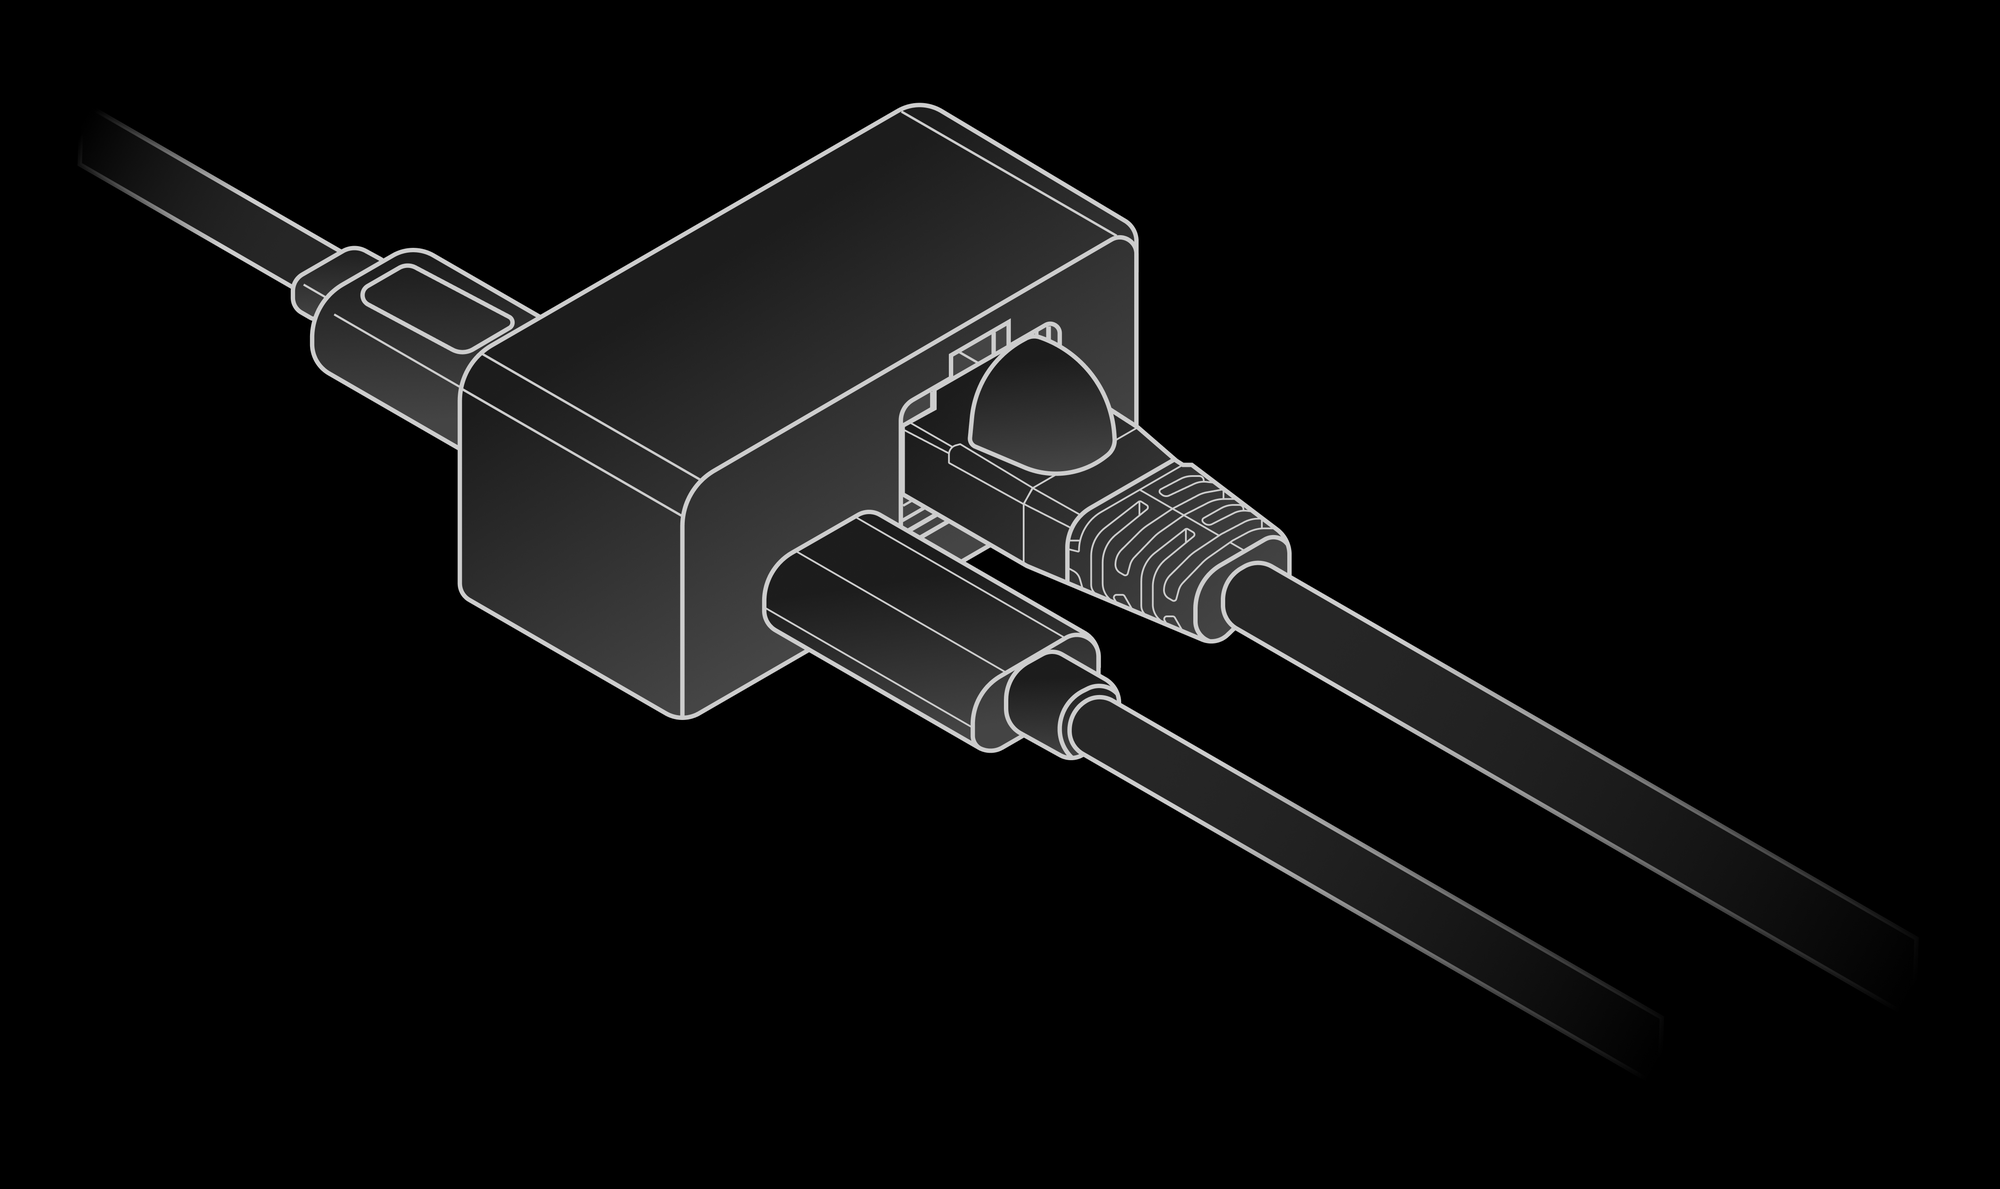
Use the USB-C to Ethernet power adapter to connect the Ethernet cable and power cable. For the power cable, we recommend a USB-A to USB-C cable. After connecting, check that the data acquisition board indicator looks normal.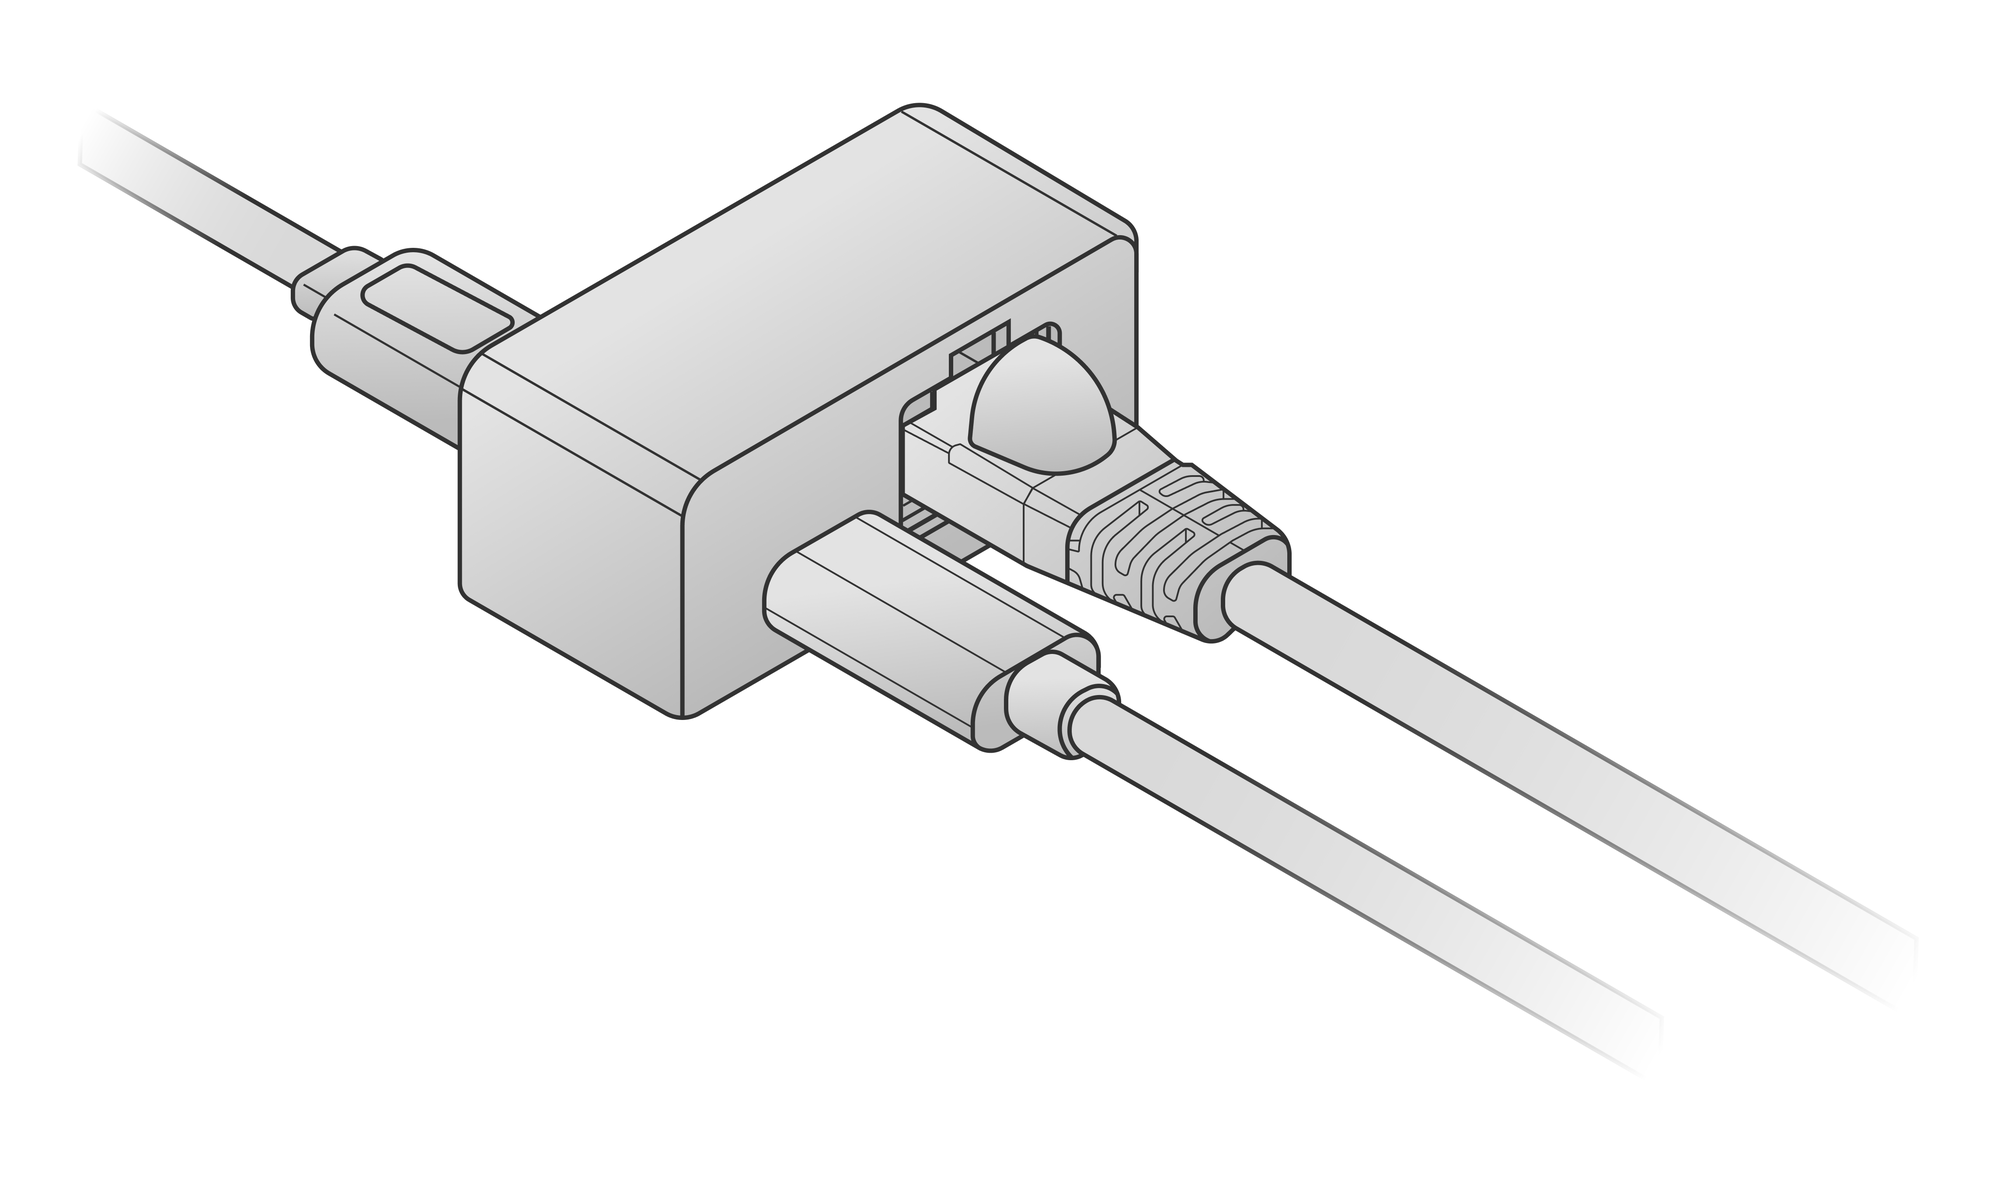
Step 5: Configure Computer Network
Verify the computer and glove are on the same network segment (default segment is 192.168.1.x). The first three octets of the IP address must match, and set the subnet mask to 255.255.255.0. The default IP is 192.168.1.100 for the left hand and 192.168.1.101 for the right hand. Avoid assigning these addresses to the computer to prevent conflicts. Pick either method:The following example connects to the right-hand glove. Adjust the IP address based on the target glove.
Method 1: Graphical Interface
- Open Settings and go to Network
- Click the gear icon in the Wired row
- Switch to the IPv4 tab and select Manual for IPv4 Method
- Under Addresses, enter Address
192.168.1.50and Netmask255.255.255.0 - Click Apply
- Run
ping 192.168.1.101in a terminal to confirm connectivity
Method 2: Command Line
Replace the interface name in the commands with your actual interface name. An address set this way is lost after a system reboot. 1. Identify the network interface nameeth0, enp3s0, or eno1.
2. Verify the Ethernet cable is connected
Link detected: yes.
3. Clear existing IP addresses
/24 corresponds to a subnet mask of 255.255.255.0.inet 192.168.1.50/24.
7. Test connectivity
ping 192.168.1.100 instead. Receiving a response indicates a successful connection.
Step 6: Wear the Wuji Glove
Put on the Wuji Glove and adjust the position of the data acquisition board using the arm strap.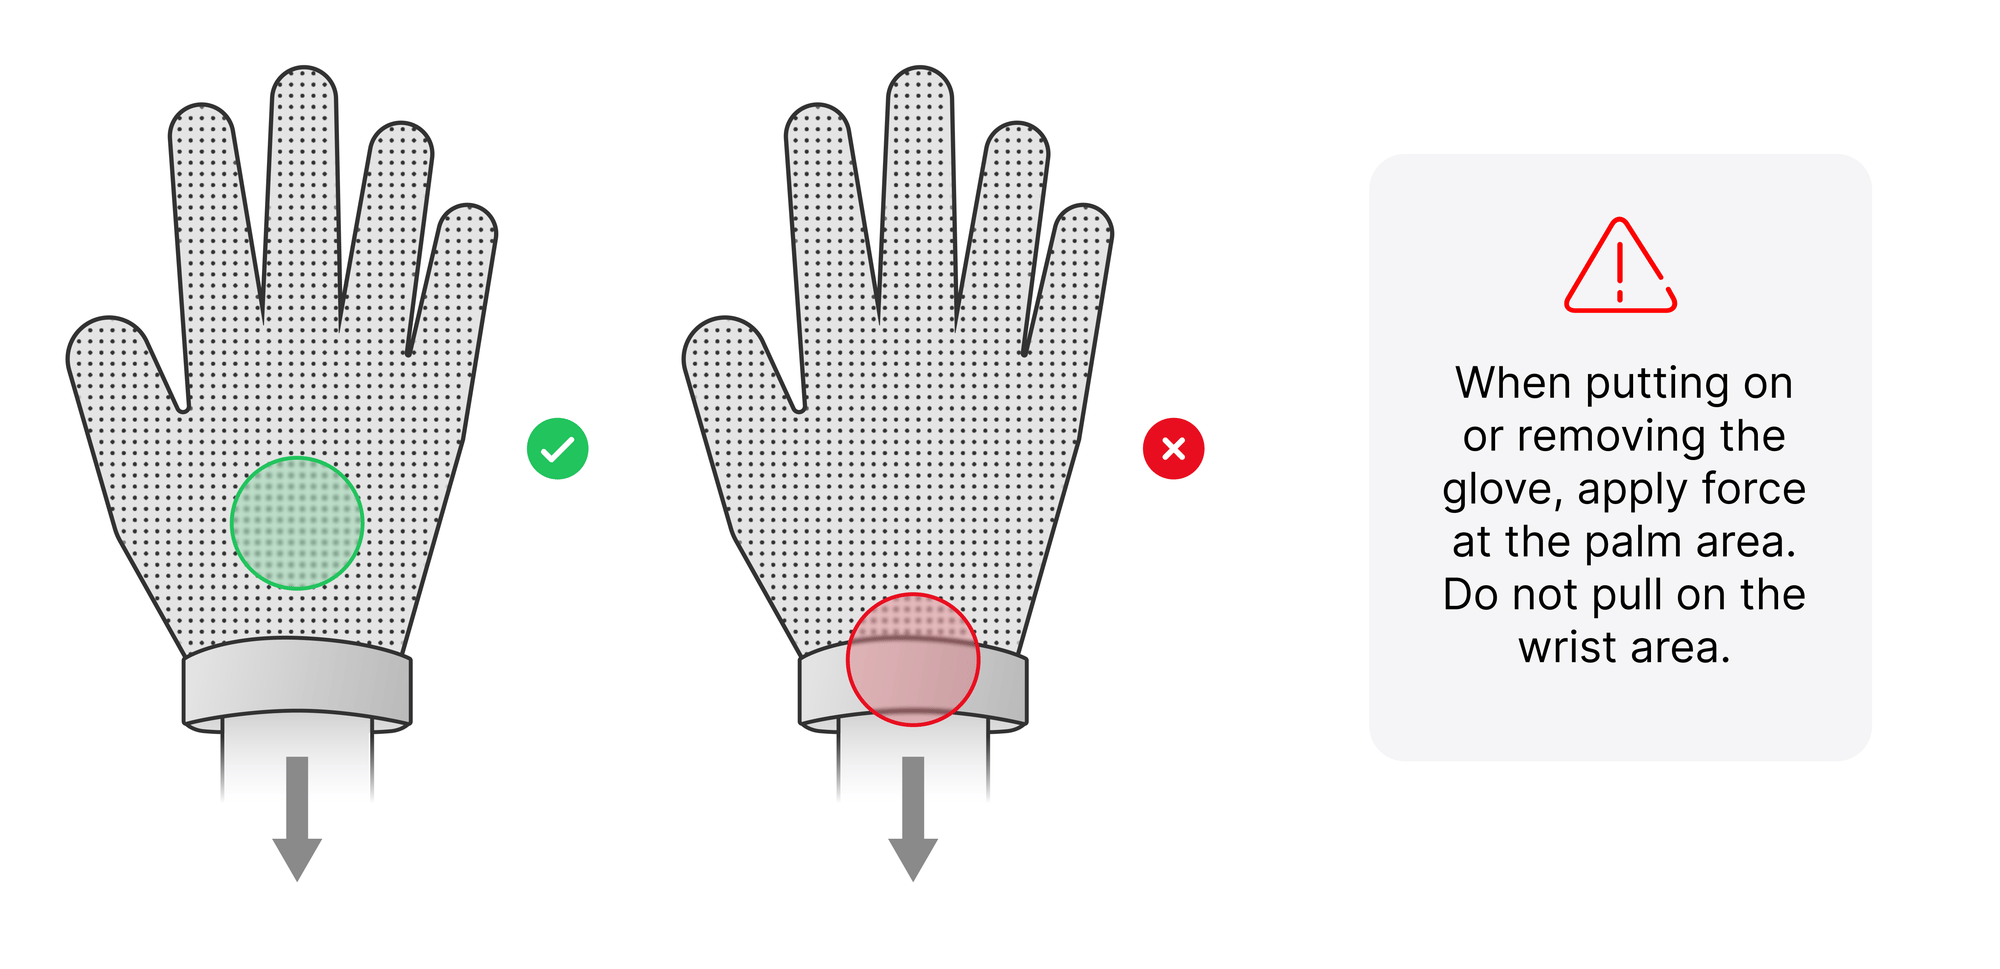
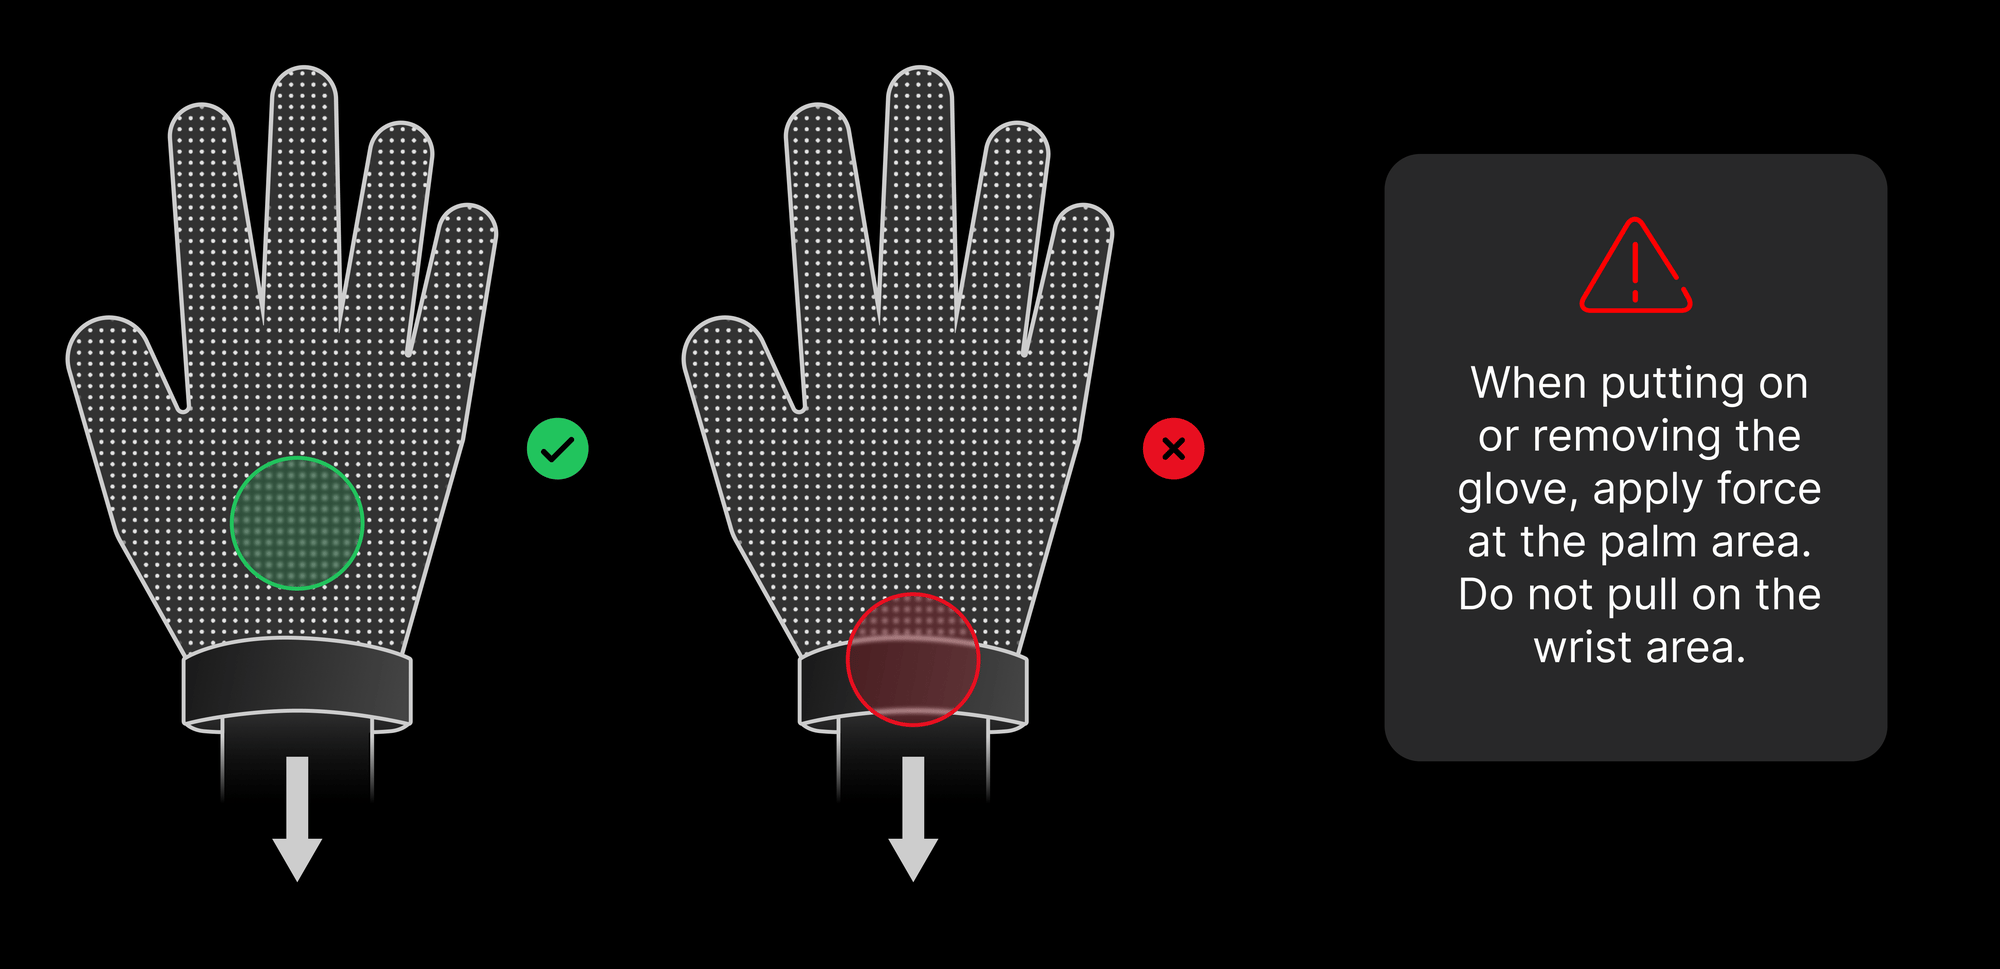
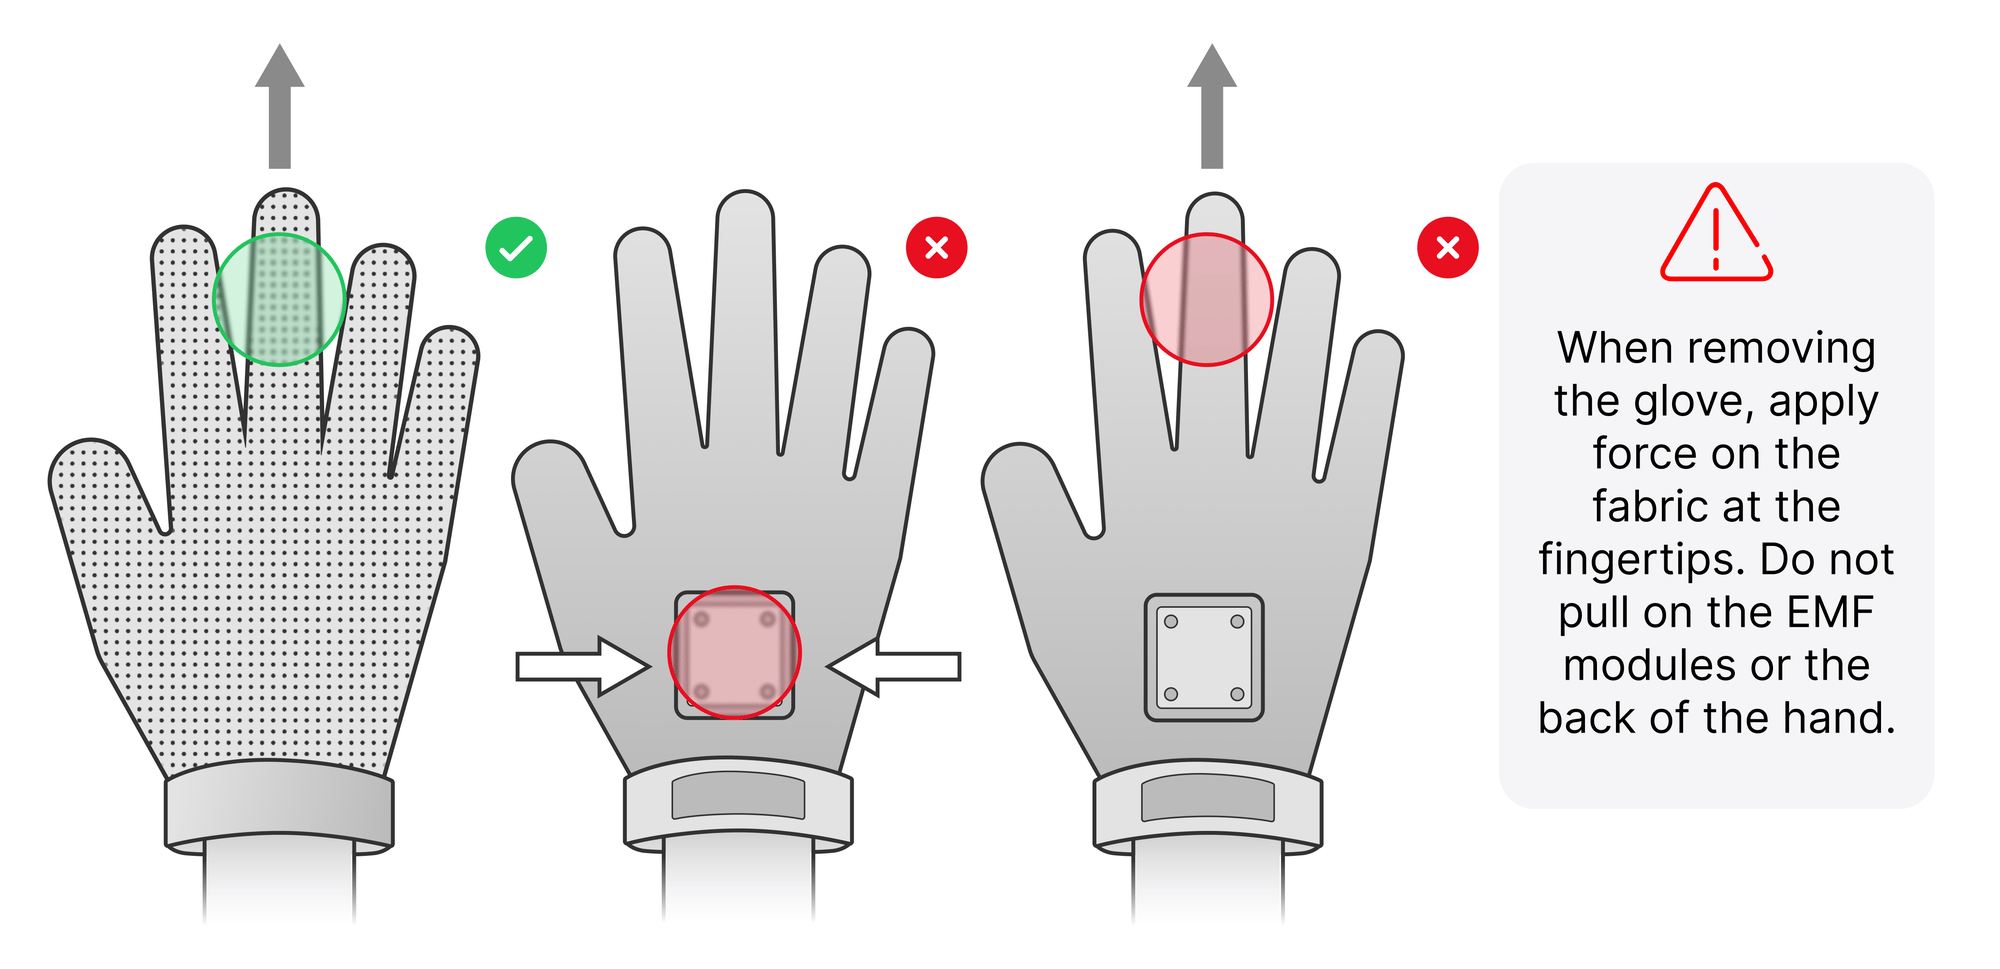
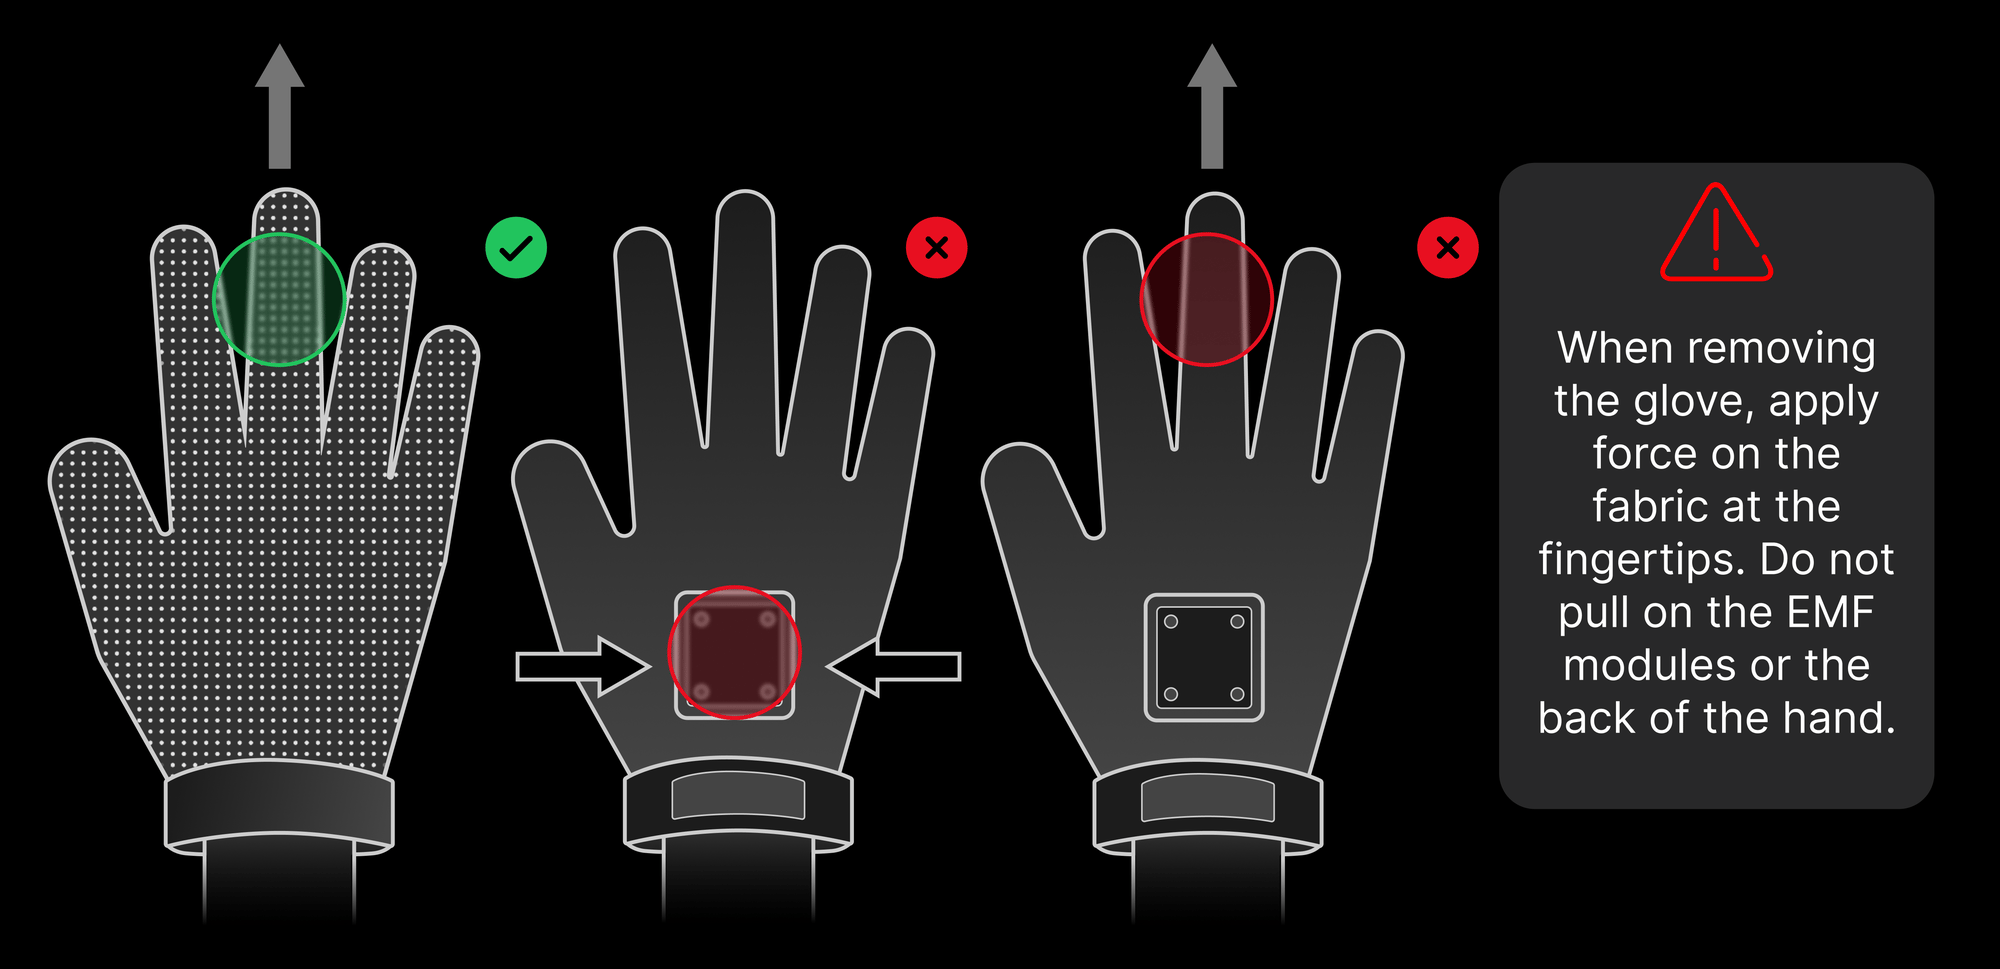
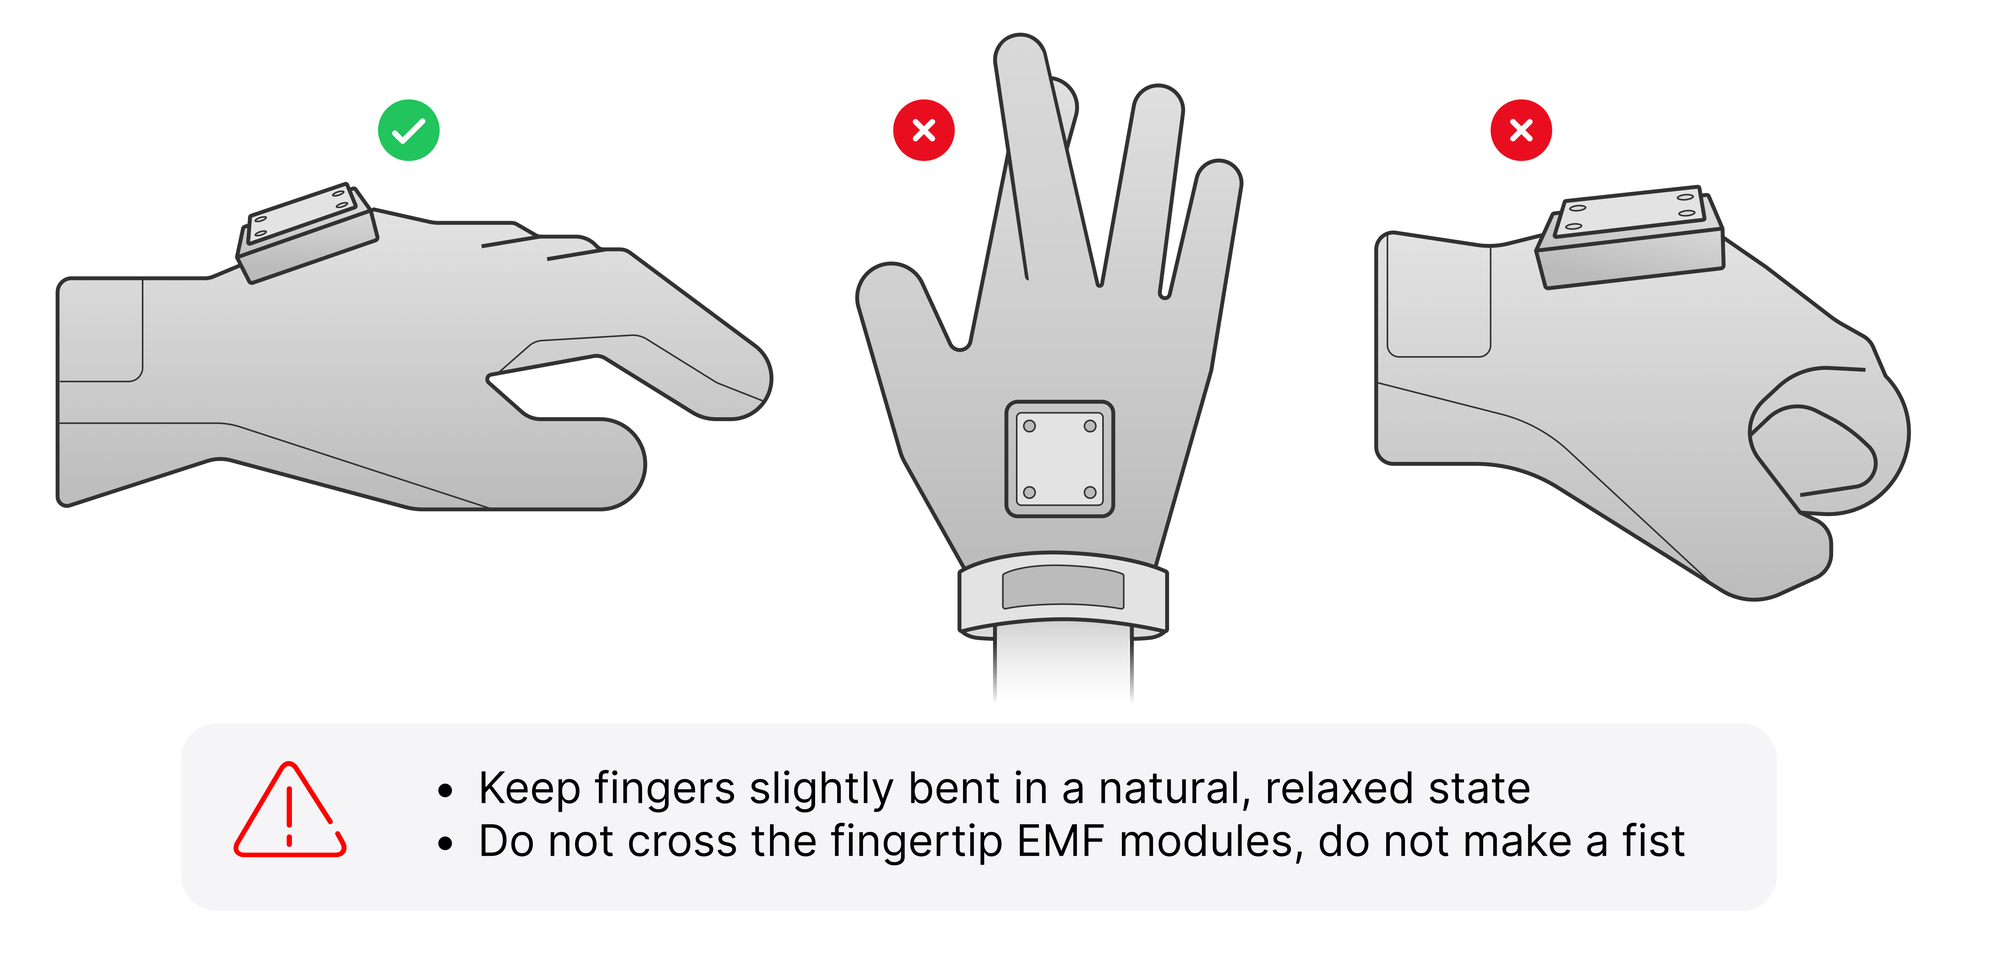
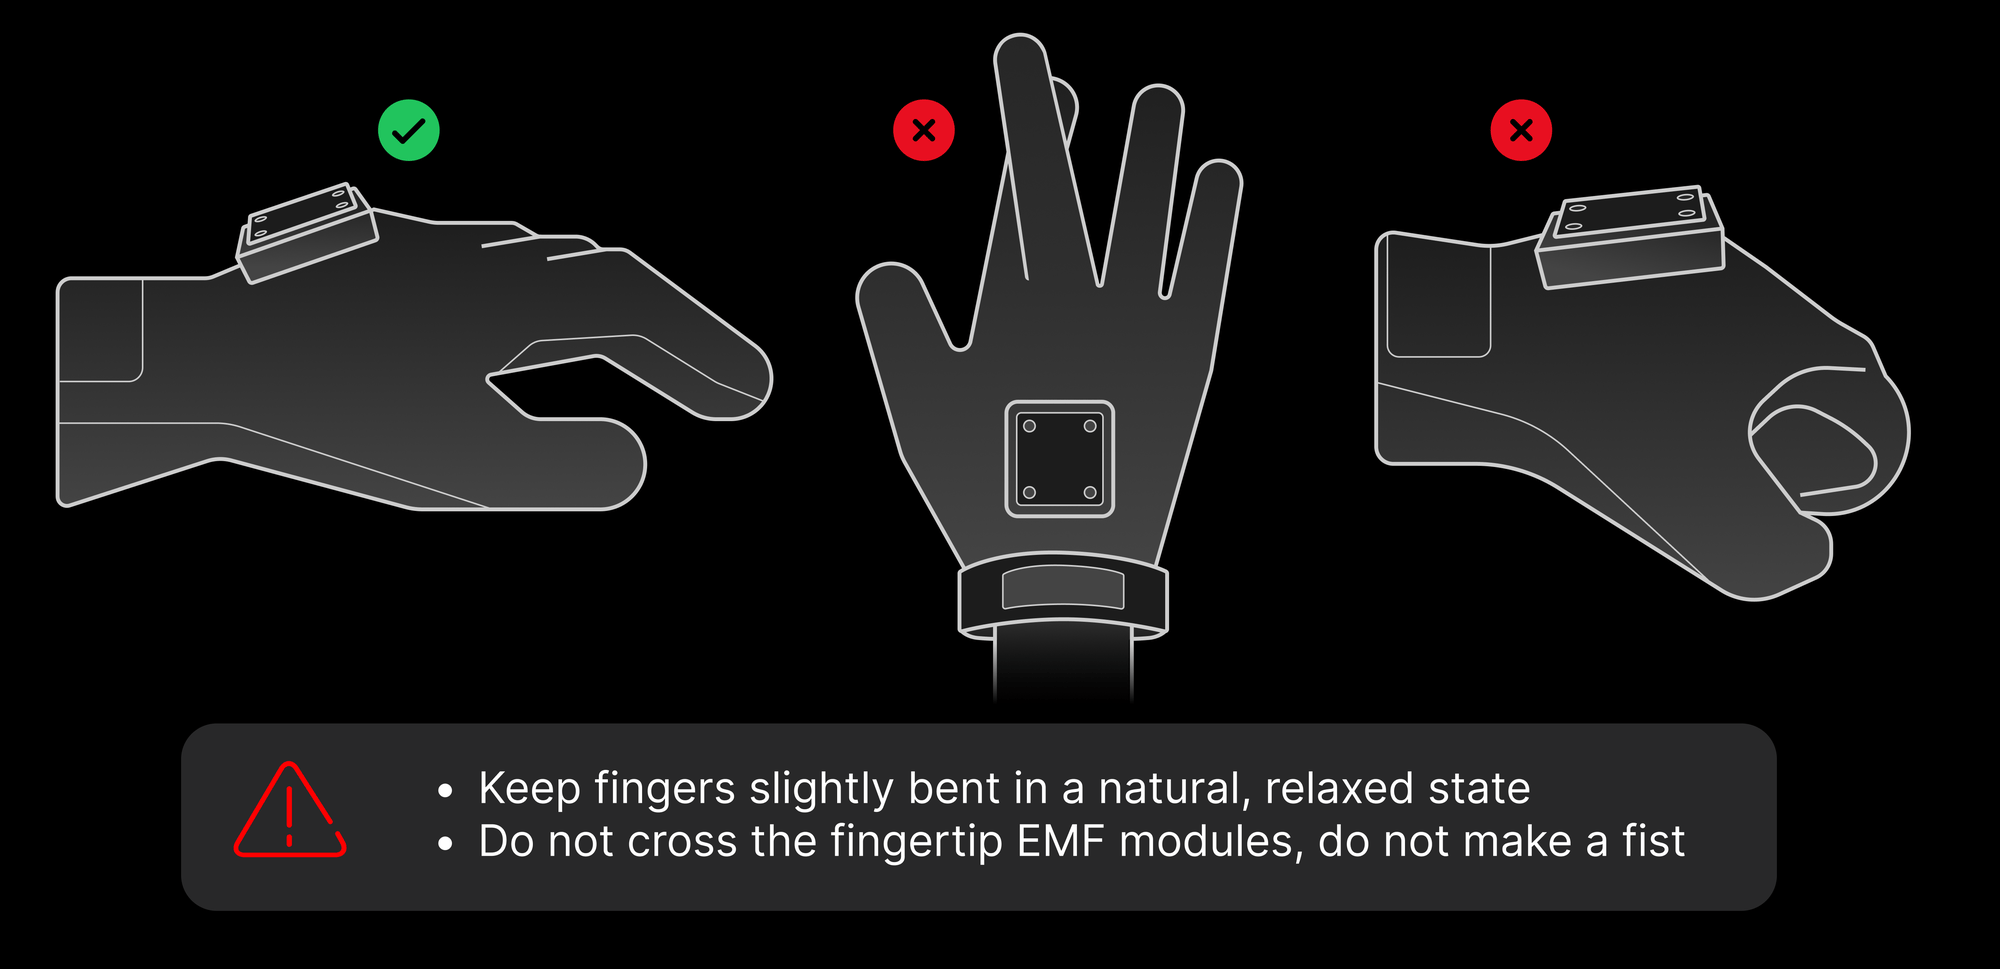
Important: After wearing, before connecting to software, ensure:
- Keep fingers slightly bent in a natural, relaxed state
- Do not cross the fingertip EMF modules, do not make a fist
Step 7: Install the Tracker (Optional)
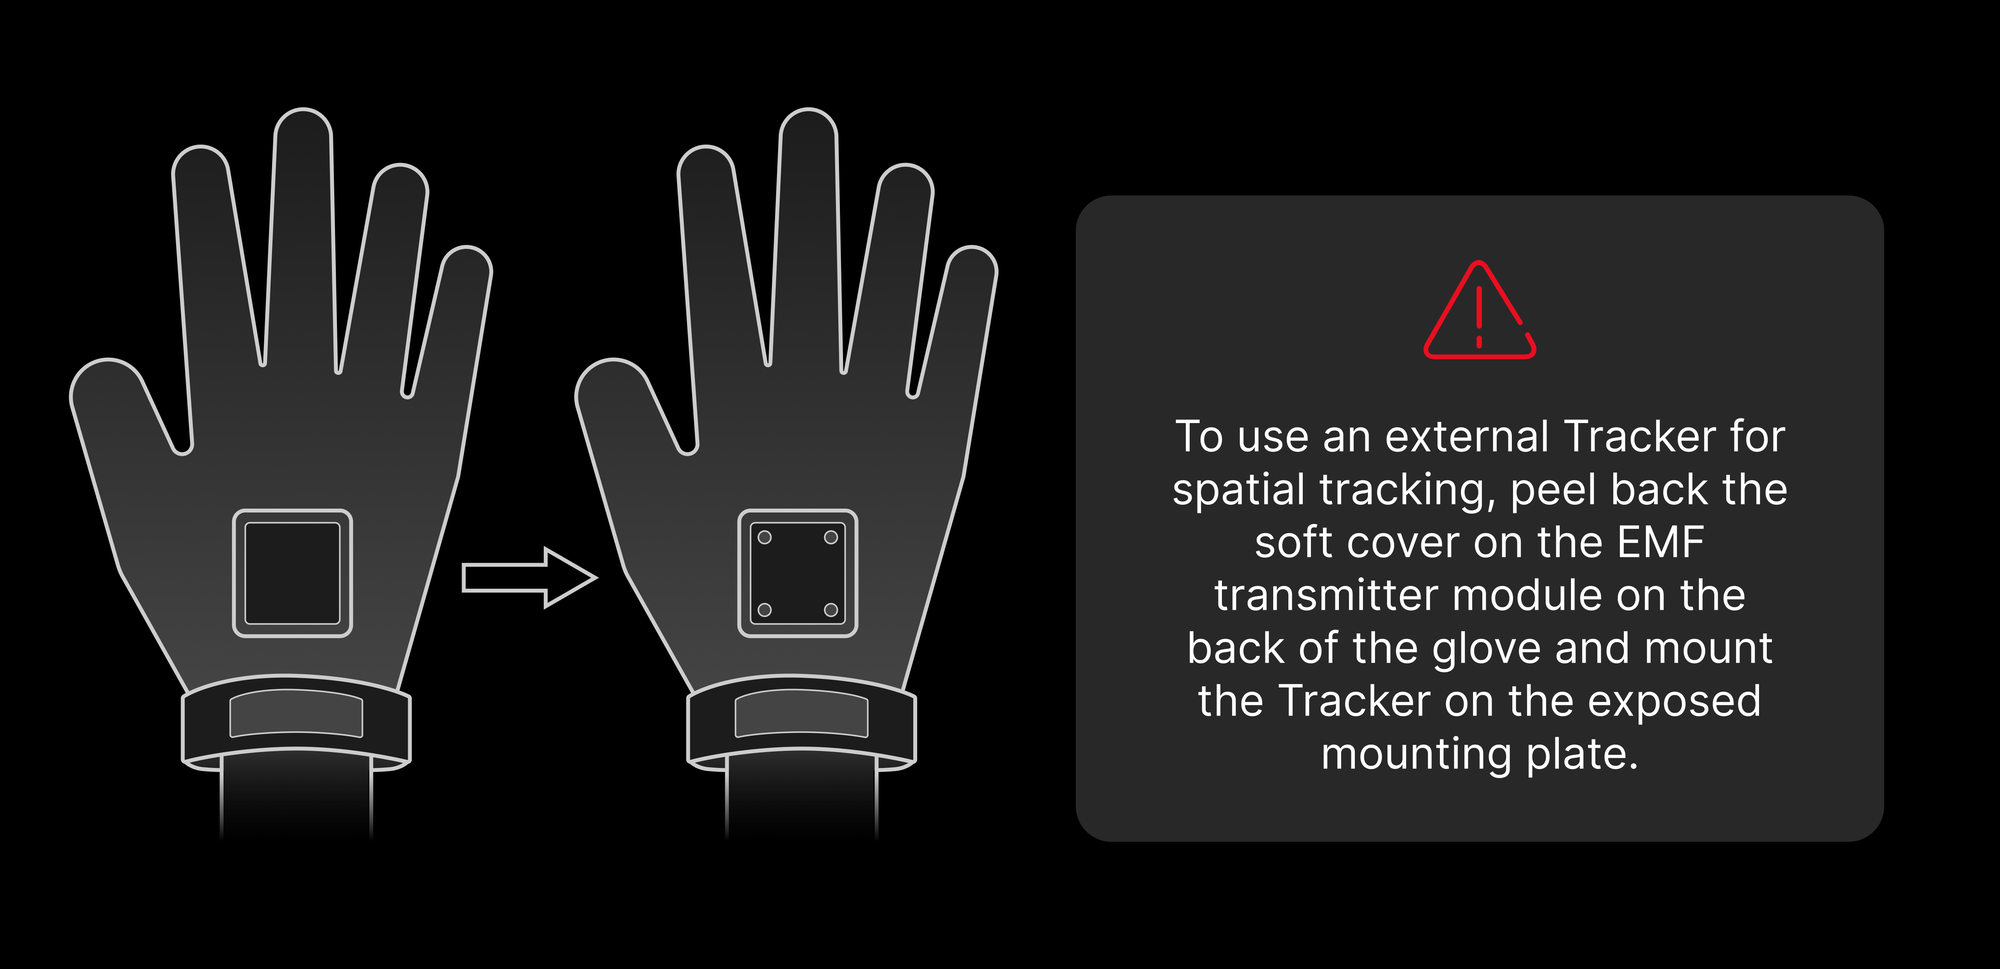
To use an external Tracker for spatial tracking, peel back the soft cover on the EMF transmitter module on the back of the glove and mount the Tracker on the exposed mounting plate.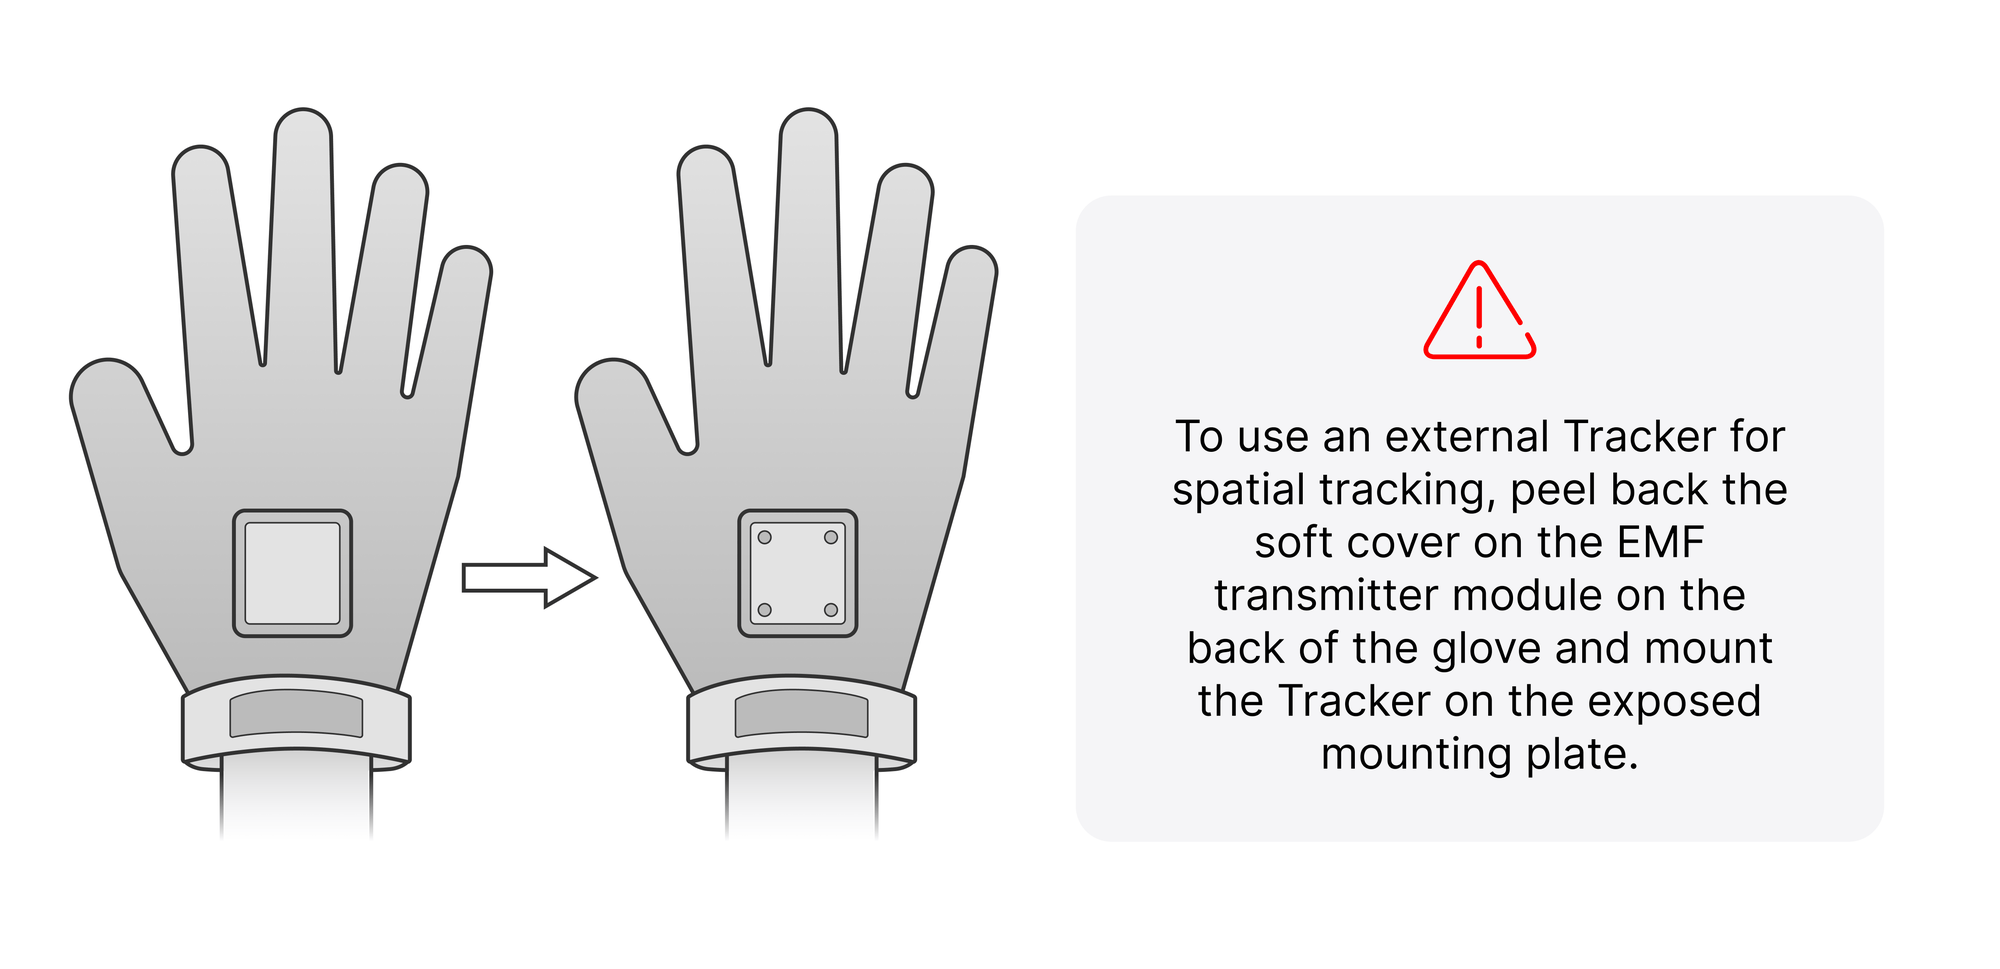
Step 8: Confirm the Device Is Online
wuji devices lists the devices on the same subnet, wuji ping returns device type, serial number, firmware version, and IP, and wuji doctor runs a health check that locates EMF disconnections along with tactile dead points, rows, and columns.
When the list comes back empty, check that the device has power and that the host sits on the same subnet as the glove.
Step 9: Connect to the Device and Check the State
manager.connect(sn="<serial number>") instead. For connecting by address, by handedness, and other options, see device connection in the Wuji SDK.
Only one client holds the glove connection at a time. When wuji viz or another SDK script already holds the same glove, this connection can’t be established, so exit the running client and try again. See Free Up an Occupied Device Connection.
The indicator light on the data acquisition board tracks the connection. Yellow very slow flash means the host is connected but not pulling data, and cyan heartbeat means data is streaming. Red fast flash means the Ethernet link is down, and red solid means a sensor hardware fault. For how to handle each state, see Connection States and the Indicator Light.
Step 10: Run the Calibration
Hand model calibration is isolated per user, and the Default user can’t run it. Create a named profile, switch to it, then calibrate:Step 11: Get the First Data Frame
--count 1 exits after one full frame arrives. To read data in an application, connect to the glove with the Wuji SDK and subscribe to tactile, emf_poses, or hand_skeleton.
When tactile values read all 0 or -1, EMF confidence runs low, or the IMU drifts continuously, see Troubleshooting.
For what each stream means and its structure, frames, and timestamps, see SDK Data Reference.
To check the data visually, run wuji viz and view the hand skeleton, EMF receivers, tactile point cloud, and raw tactile matrix in your browser. For the full command, see Live Visualization.
Step 12: Stop and Take Off the Glove
Once reading finishes, disconnect to free the glove for other clients:Step 13: Upgrade the Firmware
Once the first data frame arrives, upgrade the firmware to the latest version:--check is read-only and lists which devices have a firmware update. --type wuji_glove upgrades every glove in scope to its own latest version, and each device reboots into the new firmware once flashing finishes. For the full scope and action options, see Wuji CLI firmware upgrade.
The calibration interfaces have minimum firmware and SDK versions. For the pairing, see the component version table in Release Notes.
Done when: the device is online, the health check passes, hand model calibration completes, at least one valid frame arrives with a timestamp and handedness, and the firmware is up to date.
Cross-Product Teleoperation
This section needs one Wuji Glove that has finished the real-device run, plus one Wuji Hand 2 that has finished its quick start with all 20 joints online. Both devices sit on the same subnet and share the same handedness. Once the glove is on, it streams hand keypoints continuously. Retargeting converts them into 20 joint angles and sends them to the hand, which follows the finger motion in real time.Confirm Both Devices Are Online
wuji_hand_2 and wuji_glove. Check the serial numbers, firmware versions, and handedness. With other devices of the same type on the subnet, note the target serial number for the next step.
Run the Teleoperation Example
The full retargeting and teleoperation implementation lives in the Wuji SDK repository examples and updates together with the interface:SIDE constant at the top of the script.
The example scans and connects to the device it finds. With several hands on the subnet, confirm the target device first so you don’t drive one someone else is using.
Complete a Cross-Product Motion
- Clear the hand’s workspace and confirm nobody is touching it.
- Put the glove on with fingers relaxed and slightly curled.
- Run the example, starting with slow, small motions.
- Watch whether motion stays continuous, directions match, and no error code fires.
- Press Ctrl+C to stop. On exit, the example disables the hand and disconnects.