Integration Guide
System Requirements
| Feature | Requirements |
|---|---|
| MuJoCo Visualization | Python 3.8+ MuJoCo 2.3+ |
| ROS2 Visualization (RViz) | ROS2 (Kilted Kaiju / Jazzy Jalisco) Ubuntu 24.04+ |
| Isaac Sim USD | Isaac Sim 2024.x+ |
| STEP / CAD | CAD tool with STEP support (e.g., FreeCAD, SolidWorks) |
Installation
Make sure you've completed the configuration in System Requirements before proceeding.
git clone https://github.com/wuji-technology/wuji-description.git
cd wuji-description
Simulation and Visualization
The repository provides model assets for mainstream simulation/visualization ecosystems. Pick the section matching your tool.
MuJoCo
Wuji Hand
# Right hand
python -m mujoco.viewer --mjcf=hand/body/mjcf/right.xml

# Left hand
python -m mujoco.viewer --mjcf=hand/body/mjcf/left.xml
Wuji Hand soft-pad variant
# Right hand
python -m mujoco.viewer --mjcf=hand/body-with-soft/mjcf/right.xml

# Left hand
python -m mujoco.viewer --mjcf=hand/body-with-soft/mjcf/left.xml

# Simplified-collision variant (faster contact simulation)
python -m mujoco.viewer --mjcf=hand/body-with-soft/mjcf/right_simplified.xml
Wuji Hand 2 (Beta 2)
# Right hand
python -m mujoco.viewer --mjcf=hand2/hand2_beta2/body/mjcf/right.xml

# Left hand
python -m mujoco.viewer --mjcf=hand2/hand2_beta2/body/mjcf/left.xml

# With-mount variant
python -m mujoco.viewer --mjcf=hand2/hand2_beta2/body/mjcf/right_with_mount.xml
The Wuji Hand 2 (Beta 2) MJCF keeps the Beta 1 actuator naming, collision policy, and display groups below, with these differences:
- Model names are
wujihand2-beta2-{left,right}, andwujihand2-beta2-{left,right}-mountfor the with-mount variant - Each fingertip tactile pad is its own body (
{l,r}_{finger}_tip_sensor_frame, shown light blue, where{finger}isthumb,index_finger,middle_finger,ring_finger, orpinky) with its own mass and inertia, ready for a force / torque sensor or a body-level pose query - The fingertip query sites (
{l,r}_{finger}_tip) match Beta 1 and remain sites in display group 3
Wuji Hand 2 (Beta 1)
# Right hand
python -m mujoco.viewer --mjcf=hand2/hand2_beta1/body/mjcf/right.xml

# Left hand
python -m mujoco.viewer --mjcf=hand2/hand2_beta1/body/mjcf/left.xml

# With-mount variant
python -m mujoco.viewer --mjcf=hand2/hand2_beta1/body/mjcf/right_with_mount.xml
Wuji Hand 2 (Beta 1) MJCF model specs:
- Actuators follow the
{l,r}_{THJ|FFJ|MFJ|RFJ|LFJ}{0-3}naming scheme. The five prefixes map to the thumb, index, middle, ring, and pinky fingers. J0 is the root flexion joint and J3 is the distal DIP joint - Each hand carries five fingertip query sites —
thumb_tip,index_finger_tip,middle_finger_tip,ring_finger_tip, andpinky_tip(with anl_/r_prefix) — for grasp-point queries and fingertip trajectory evaluation - Collision geometry is the convex hull of each link mesh. Every link participates in collision, with only 10 assembly-overlap pairs excluded (each finger's proximal and proximal-abduction links against the wrist). Inter-finger and fingertip–palm contacts stay live
- Display groups: group 1 visual (silver), group 2 collision (translucent light purple), and group 3 fingertip sites
- The fingertip soft-pad meshes (
*_tip.STL) ship with the package but aren't attached as collision geometry. Fingertip contact is carried by the distal-segment geometry, so the contact point sits slightly off the real finger pad
Impact-resistant Adapter
python -m mujoco.viewer --mjcf=hand/attachment/impact-resistant-attachment/mjcf/docking.xmlMuJoCo Viewer Controls
| Action | Function |
|---|---|
| Left-click drag | Rotate view |
| Right-click drag | Pan view |
| Scroll wheel | Zoom (forward/backward) |
| Double left-click | Select object, camera tracks the object |
| Double right-click | Deselect, return to free view |
| Ctrl + left-click drag | Apply force to selected object |
| Ctrl + right-click drag | Apply torque to selected object |
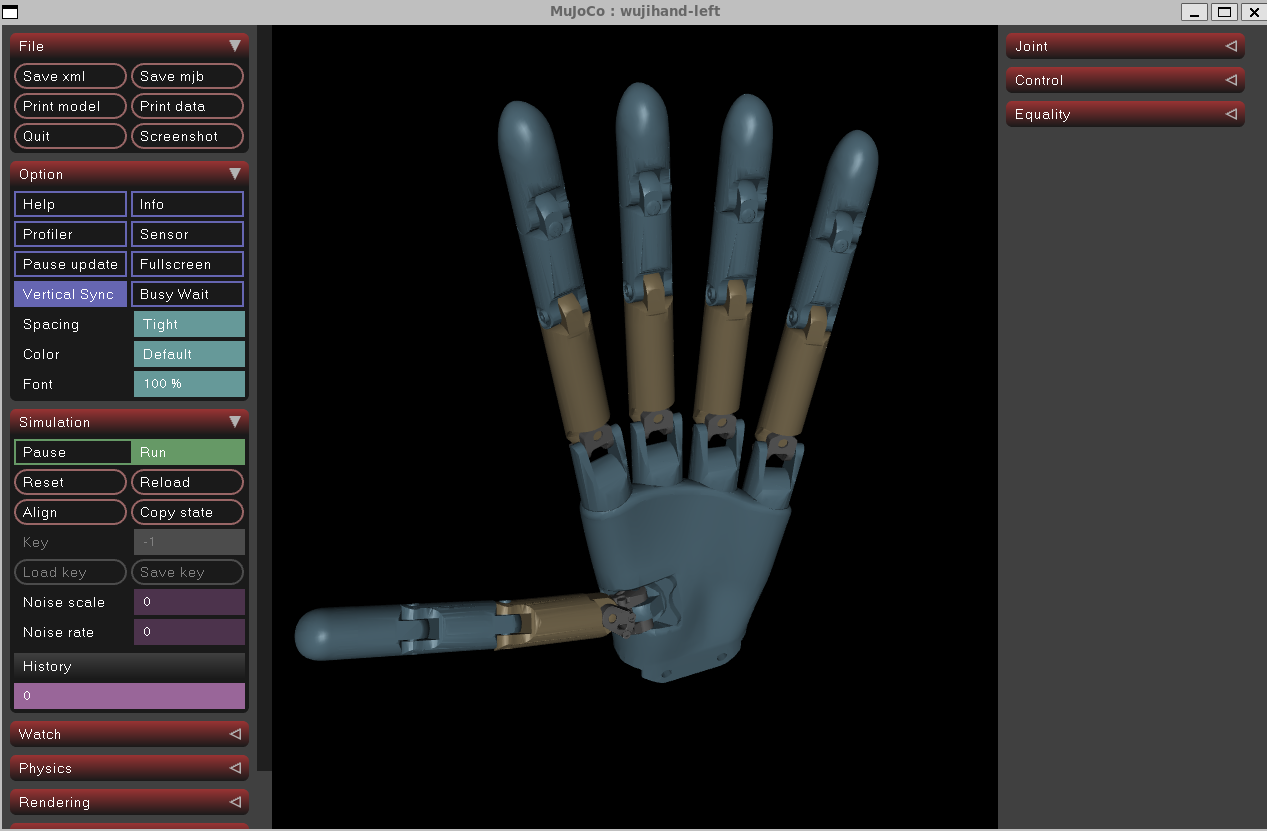
Result
Uses the left hand as an example. Load other models with the commands above.
ROS2 / RViz
Installation
hand/body/ is the ROS2 package source (wuji_description). Installation also pulls in hand/attachment/ and hand/body-with-soft/ into the package share, so clone the entire repository into your workspace src/ rather than copying hand/body/ alone. The repository also carries two standalone packages: wuji_hand2_beta2_description (rooted at hand2/hand2_beta2/body/) for the Wuji Hand 2 (Beta 2), and wuji_hand2_beta1_description (rooted at hand2/hand2_beta1/body/) for the Wuji Hand 2 (Beta 1). The distinct package names let both coexist in one workspace. Build them with colcon build --packages-select wuji_hand2_beta2_description or colcon build --packages-select wuji_hand2_beta1_description.
# 1. Source ROS2 environment, replace <distro> with your installed ROS2 distribution
source /opt/ros/<distro>/setup.bash

# 2. Create workspace (if not exists)
mkdir -p ~/ros2_ws/src

# 3. Clone repository
cd ~/ros2_ws/src
git clone https://github.com/wuji-technology/wuji-description.git

# 4. Initialize rosdep (first time only, skip if already initialized)
sudo rosdep init
rosdep update

# 5. Install dependencies
cd ~/ros2_ws
rosdep install --from-paths src --ignore-src -r -y

# 6. Build and source
colcon build --packages-select wuji_description
source install/setup.bash
Visualization
# Left hand (default)
ros2 launch wuji_description display.launch.py

# Right hand
ros2 launch wuji_description display.launch.py hand:=right
display.launch.py loads the standard Wuji Hand model. After the build, the package:// paths in the soft-pad variant ROS URDFs (hand/body-with-soft/urdf/{left,right}-ros.urdf) also resolve, so you can load them from a custom launch file or robot_state_publisher. The Wuji Hand 2 ROS URDFs resolve through their own packages once built: hand2/hand2_beta2/body/urdf/{left,right}-ros.urdf through wuji_hand2_beta2_description for Beta 2, and hand2/hand2_beta1/body/urdf/{left,right}-ros.urdf through wuji_hand2_beta1_description for Beta 1. The with-mount variants ({left,right}_with_mount-ros.urdf) share the same package:// prefix as the no-mount models, so one build serves either variant.
RViz Controls
| Action | Function |
|---|---|
| Left-click drag | Rotate view |
| Right-click drag | Pan view |
| Scroll wheel | Zoom |
| Shift + left-click drag | Pan view (XY plane) |
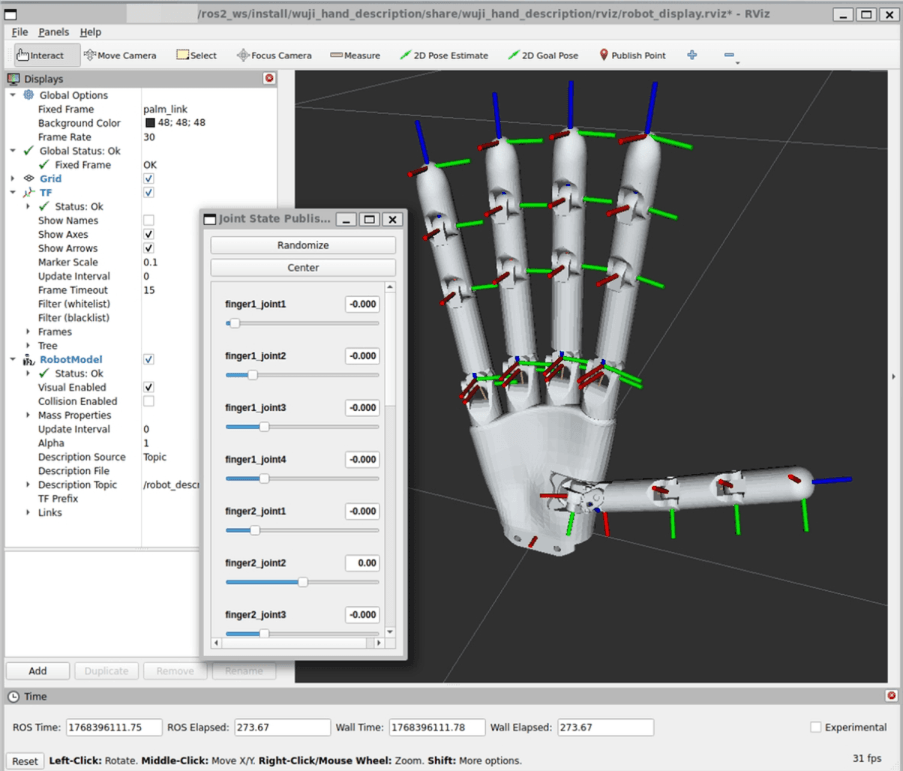
| Joint State Publisher GUI | Drag sliders to control joint angles |
Result
Isaac Sim USD
The repository provides the following Isaac Sim USD assets:
Wuji Hand
- Left hand:
hand/body/usd/left/wujihand.usd - Right hand:
hand/body/usd/right/wujihand.usd
Wuji Hand soft-pad variant
- Left hand:
hand/body-with-soft/usd/left/wujihand.usd - Right hand:
hand/body-with-soft/usd/right/wujihand.usd - Simplified-collision variants:
hand/body-with-soft/usd/{left,right}_simplified/wujihand.usd
Wuji Hand 2 (Beta 2)
- Left hand:
hand2/hand2_beta2/body/usd/left/wujihand2_beta2.usd - Right hand:
hand2/hand2_beta2/body/usd/right/wujihand2_beta2.usd - With-mount variants:
hand2/hand2_beta2/body/usd/{left,right}_with_mount/wujihand2_beta2.usd
Wuji Hand 2 (Beta 1)
- Left hand:
hand2/hand2_beta1/body/usd/left/wujihand2.usd - Right hand:
hand2/hand2_beta1/body/usd/right/wujihand2.usd - With-mount variants:
hand2/hand2_beta1/body/usd/{left,right}_with_mount/wujihand2.usd
The Wuji Hand 2 USD is a layered asset (base / physics / robot / sensor sublayers plus the logo texture). The drive gains hold the current pose when you press Play directly. The Beta 2 USD entry point is wujihand2_beta2.usd. The root prim is wujihand2_beta2_{side} for the plain models and wujihand2_beta2_{side}_mount for the with-mount variants, so Beta 2 assets never collide with Beta 1. The kp/kv drive gains are carried over from the Wuji Hand platform calibration and will be updated once system identification on the Wuji Hand 2 hardware is complete.
Open the corresponding .usd file directly in Isaac Sim. For a complete simulation example, see isaaclab-sim.
URDF Preview (non-ROS)
Without ROS installed, preview URDF models directly with any URDF viewer such as urdf-viz.
Wuji Hand soft-pad variant
urdf-viz hand/body-with-soft/urdf/right.urdfWuji Hand 2 (Beta 2)
urdf-viz hand2/hand2_beta2/body/urdf/right.urdfWuji Hand 2 (Beta 1)
urdf-viz hand2/hand2_beta1/body/urdf/right.urdfImpact-resistant Adapter
urdf-viz hand/attachment/impact-resistant-attachment/urdf/docking.urdfWuji Glove
glove/body/ provides the Wuji Glove model used for hand motion tracking. Each hand is described by a URDF skeleton with 21 revolute joints across the five fingers, an EMF transmitter base on the wrist (base_link_TX.STL), and a receiver coil on every fingertip (base_link_RX.STL). The transmitter top-cover STEP and assembly PDF are under glove/body/step/. For mounting attachment STEP files, see Wuji Glove Mounting Attachments.
urdf-viz glove/body/urdf/right.urdfMechanical Integration
Robot Arm Adapter
hand/attachment/step/ provides two adapters for mounting Wuji Hand on a robot arm end-effector flange:
| Adapter | STEP file | Structure | Active separation | Use case |
|---|---|---|---|---|
| Direct-mount Adapter | Direct-Adapter-Mount.step | Single-body, high rigidity | No | Industrial robot arms in stable, low-collision-risk workflows |
| Impact-resistant Adapter | Impact-Resistant-Adapter.step | Two modules (arm module + Wuji Hand module) | Yes (separates when external impact exceeds the safety threshold) | High-collision-risk scenarios requiring joint and motor protection |
For the impact-resistant adapter's working principle and component names, see Impact-resistant Adapter.
Integration steps
- Open the STEP file with any CAD tool that supports STEP (FreeCAD, SolidWorks, Creo)
- Adapt the design to your target robot arm's flange hole pattern
- Reference the assembly PDF drawing (
wuji-hand&Direct-Adapter-assembled-v1.pdforwuji-hand&Impact-Resistant-Adapter-assembled-v1.pdf, matching your adapter) to confirm the assembly relationships - Follow Adapter-Installation-Instructions.md to complete installation
Wuji Hand 2 Structural Assemblies and Palm Mounting Interface
hand2/hand2_beta2/body/step/ and hand2/hand2_beta1/body/step/ ship the Wuji Hand 2 full-hand (with-mount) STEP source files of each revision for mechanical integration and downstream design:
| STEP file | Purpose |
|---|---|
wuji-hand2-description-left_beta2_with_mount_step.STEP | Left-hand full assembly (Beta 2) |
wuji-hand2-description-right_beta2_with_mount_step.STEP | Right-hand full assembly (Beta 2) |
wuji-hand2-description-left_beta1_with_mount_step.STEP | Left-hand full assembly (Beta 1) |
wuji-hand2-description-right_beta1_with_mount_step.STEP | Right-hand full assembly (Beta 1) |
STEP file and geometry details may change in later revisions, while the model naming conventions stay compatible.
Palm mounting interface
hand2/hand2_beta2/attachment/ and hand2/hand2_beta1/attachment/ ship the palm mounting-interface deliverables for machining your own arm-side adapter or fixture. One pair of files per hand:
| File | Purpose |
|---|---|
wuji-hand2-description-{left,right}-mount_beta{2,1}_step.STEP | Palm mounting-interface STEP assembly (palm and wire harness only, not the full hand) |
wuji-hand2-description-{left,right}-mount_beta{2,1}.pdf | A3 drawing dimensioning the threaded holes the adapter bolts into |
The left and right files are mirror images of each other, and the palm mounting interface is identical between Beta 2 and Beta 1. attachment/ sits outside the ROS2 package root at body/, so colcon does not install it. To simulate the hand already bolted to an arm, load the _with_mount model variants under body/ instead.
Integration steps
- Open the STEP file with any CAD tool that supports STEP (FreeCAD, SolidWorks, Creo)
- Reference the left and right full assemblies to confirm the mounting face and alignment
Unitree G1 Adapter
hand/attachment/unitree-g1-attachment/unitree-g1-docking-adapter.stl mounts Wuji Hand on the Unitree G1 humanoid robot's end-effector.
Integration notes
The STL is ready for 3D printing (nylon or PETG recommended for rigidity). One end mates with the G1 end-effector flange. The other connects to Wuji Hand's standard mounting interface.
Wuji Glove Mounting Attachments
glove/attachment/ provides STEP assemblies (AP214) of the Wuji Glove mounting attachments for mechanical integration:
| STEP file | Purpose |
|---|---|
Wuji-glove-attachment.STEP | Wuji Glove mounting interface |
Pico-tracker-attachment.STEP | Adapter for mounting a PICO tracker on the glove |
Pico-controller-attachment.STEP | Adapter for mounting a PICO 4 Ultra controller on the glove |
Integration steps
- Open the STEP file with any CAD tool that supports STEP (FreeCAD, SolidWorks, Creo)
- Reference the assembly to confirm the mounting face and alignment
- Adapt the mounting holes to your target device and complete the assembly